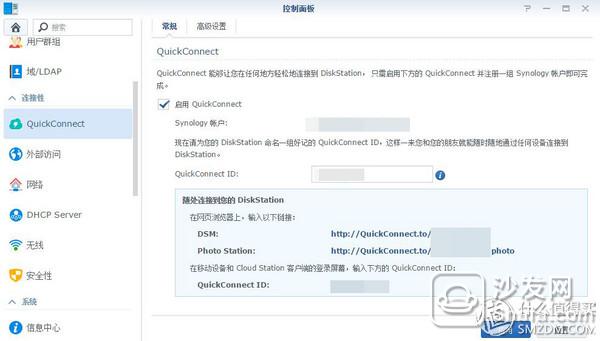
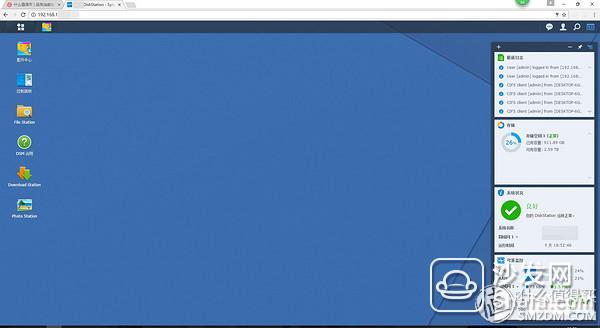
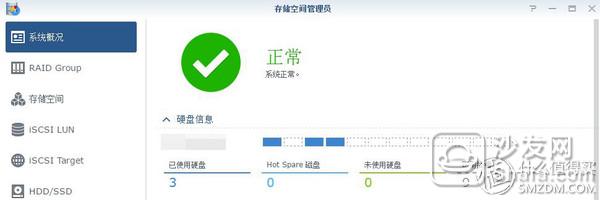
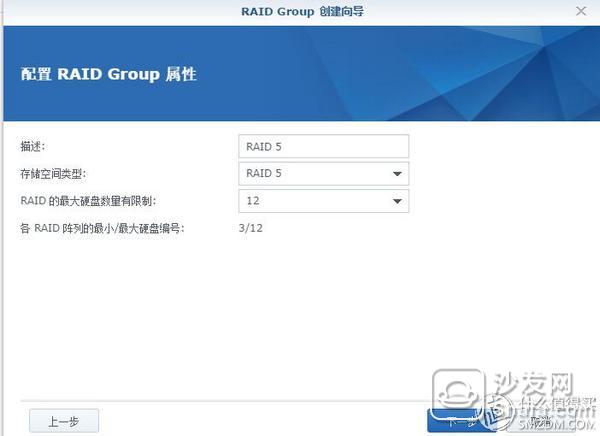
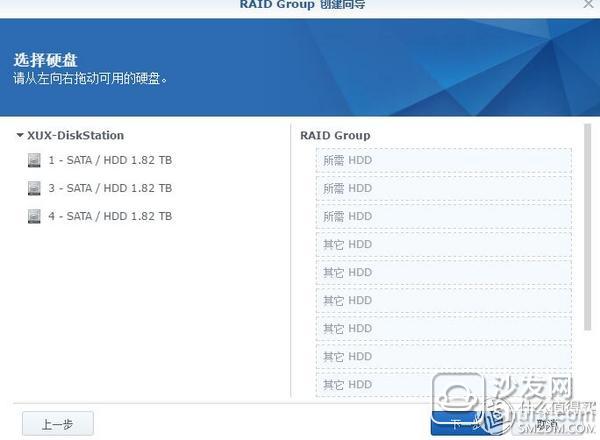
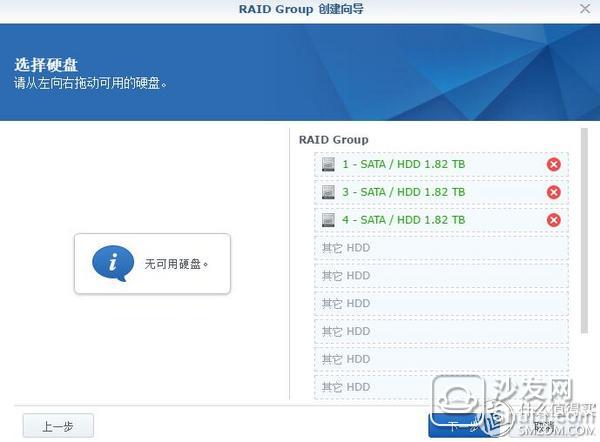
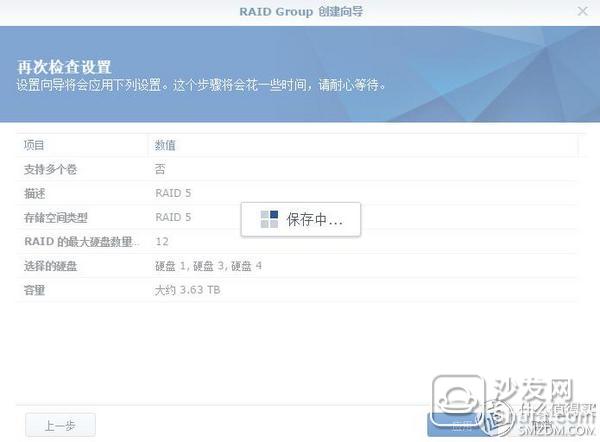
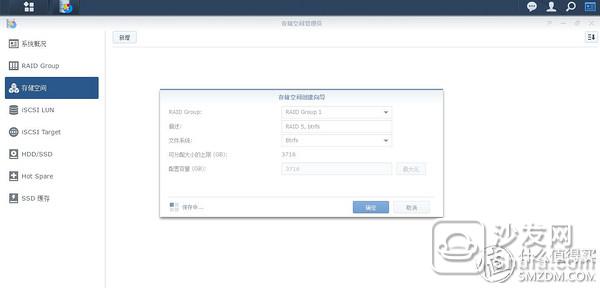
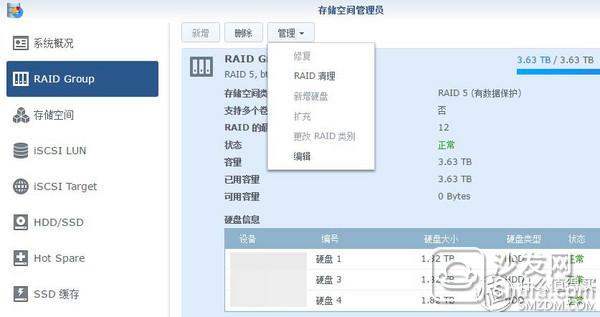
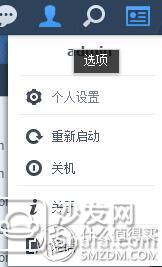
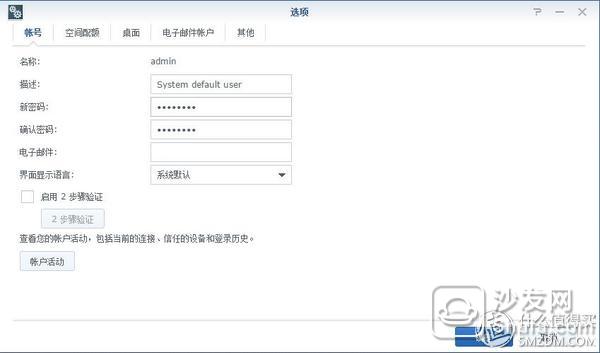
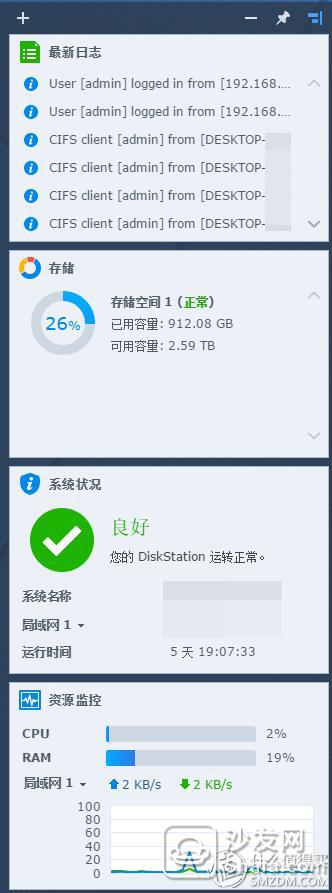
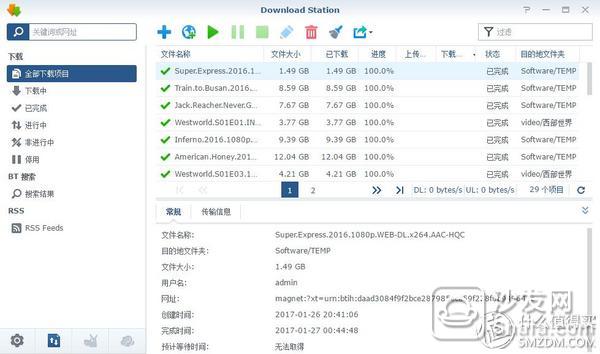
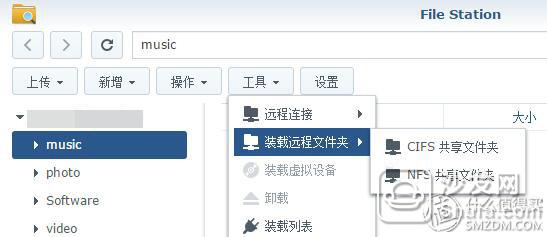
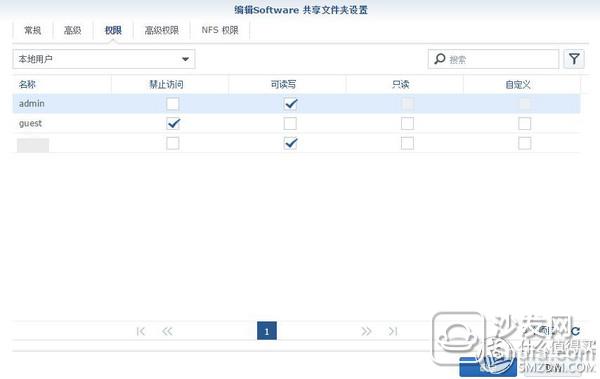
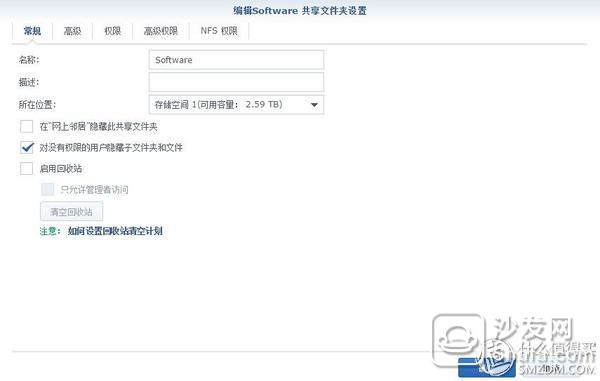
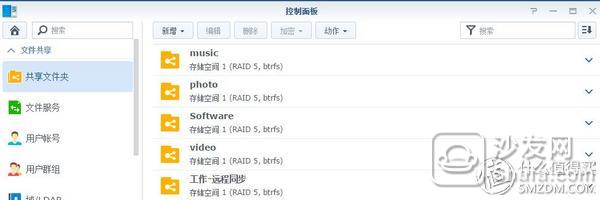
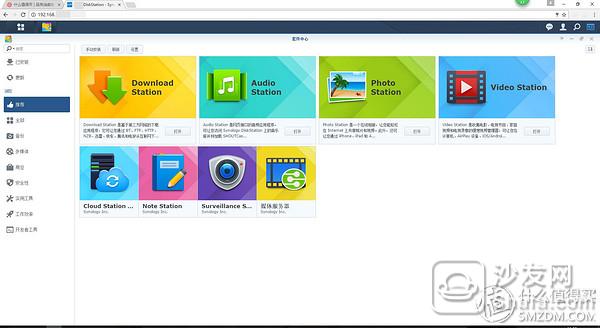
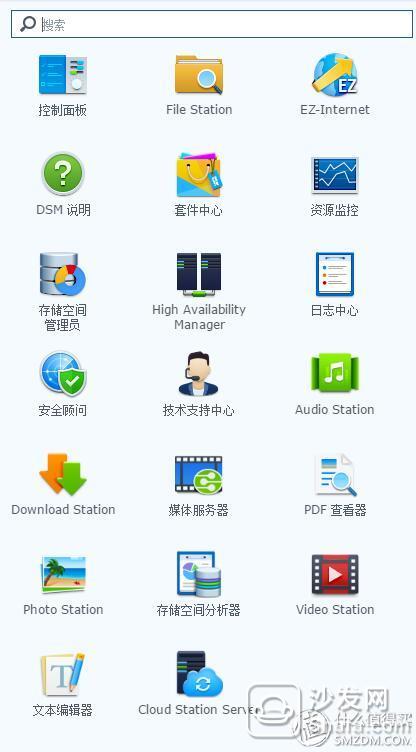
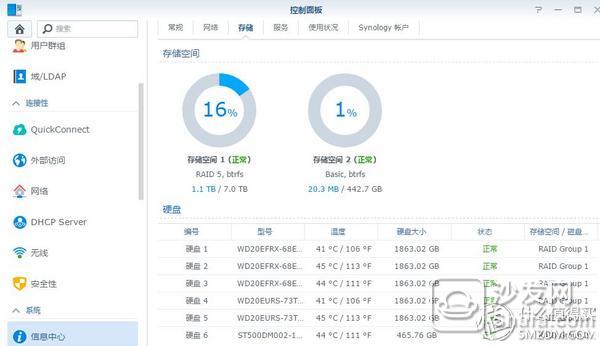
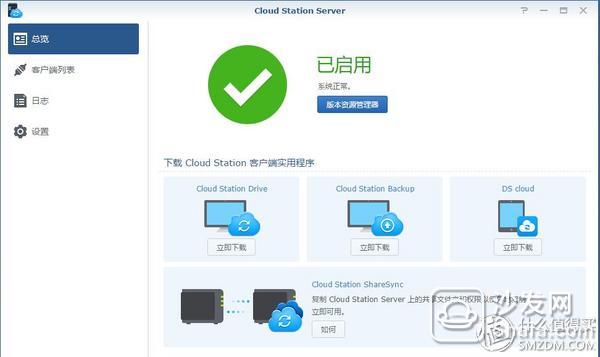
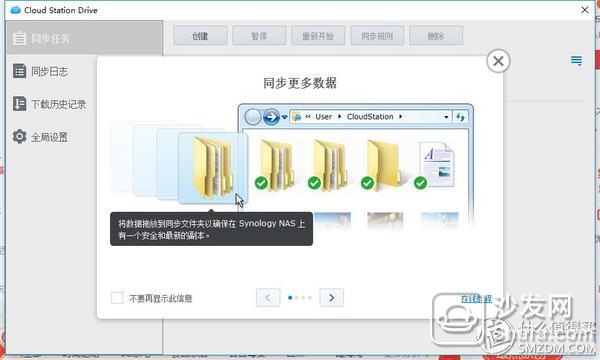
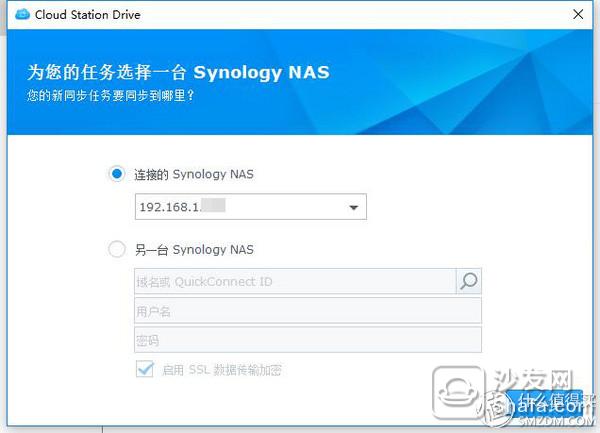
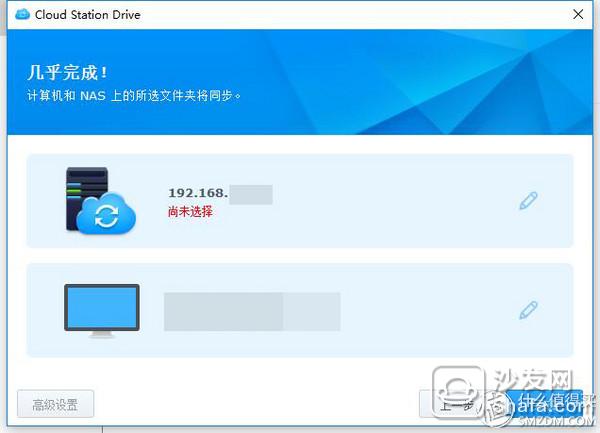
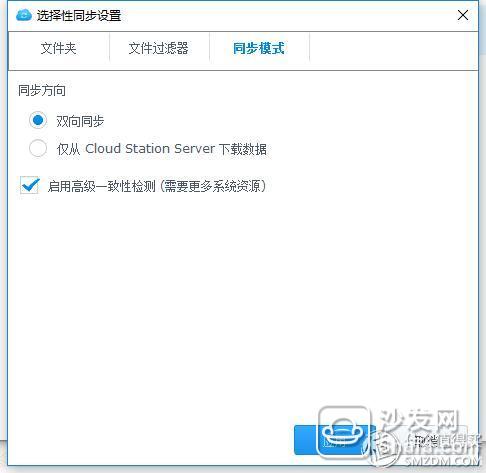
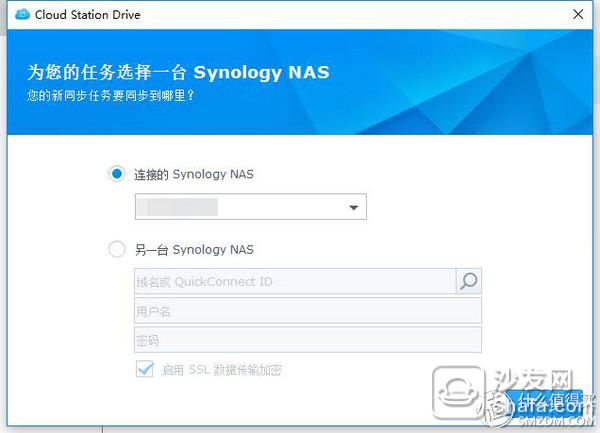
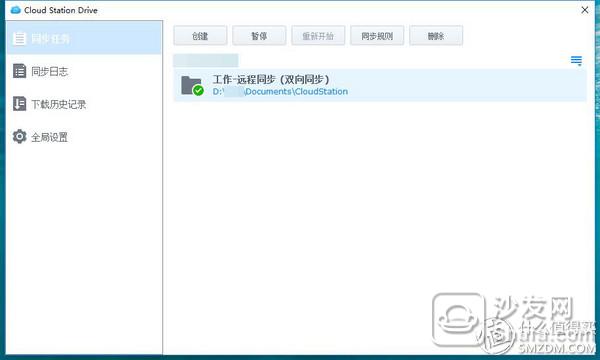
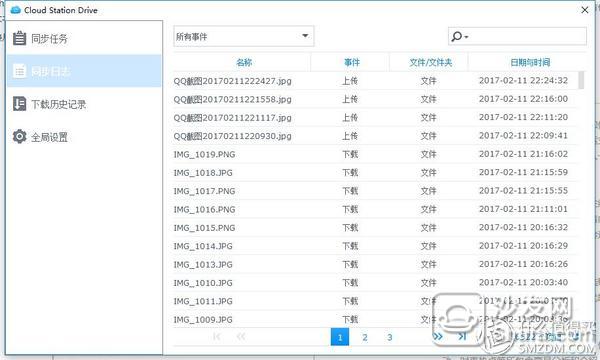
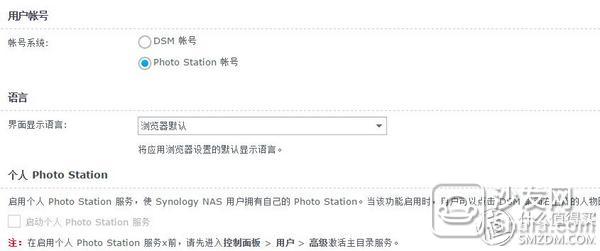
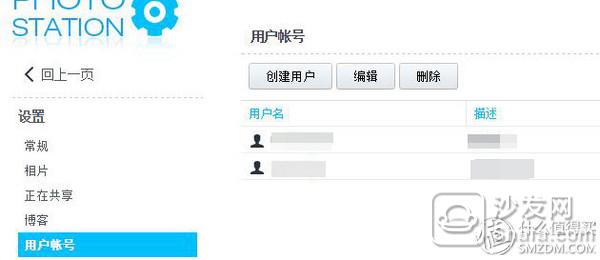
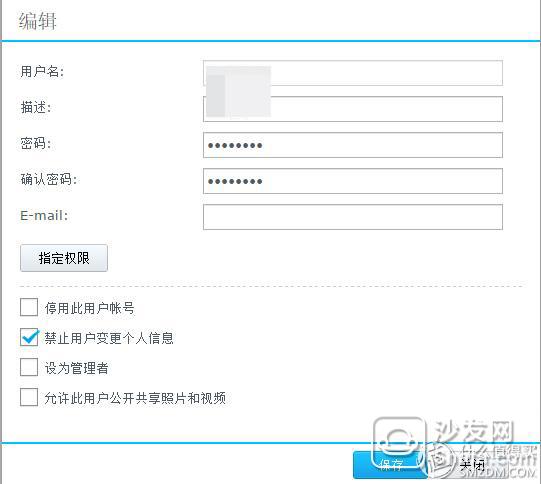
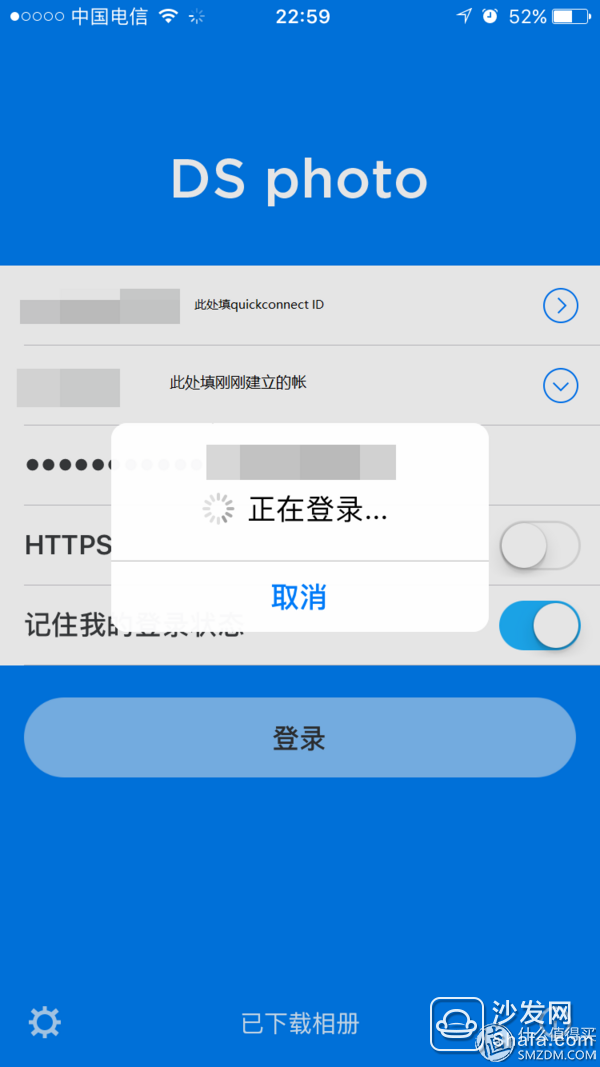
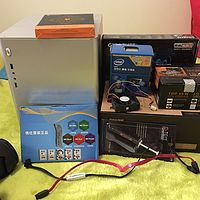
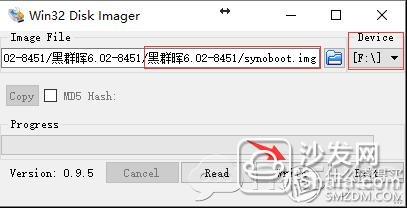
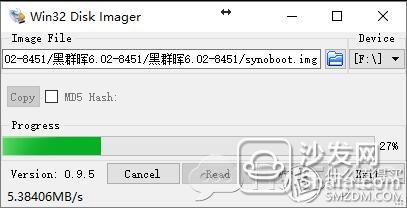
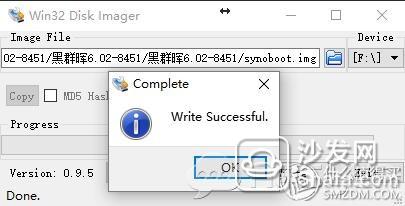
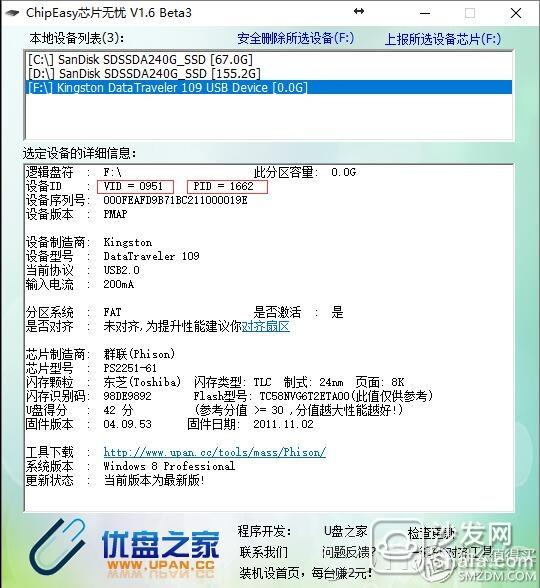
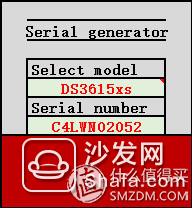
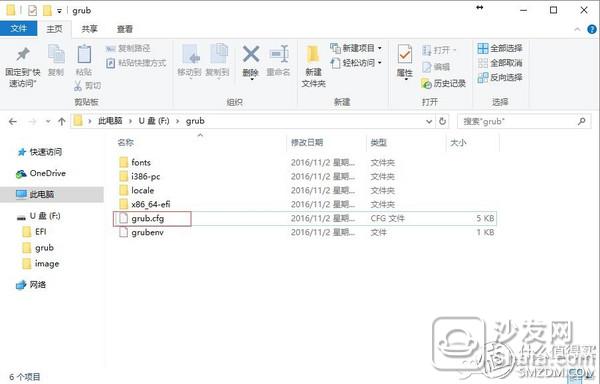
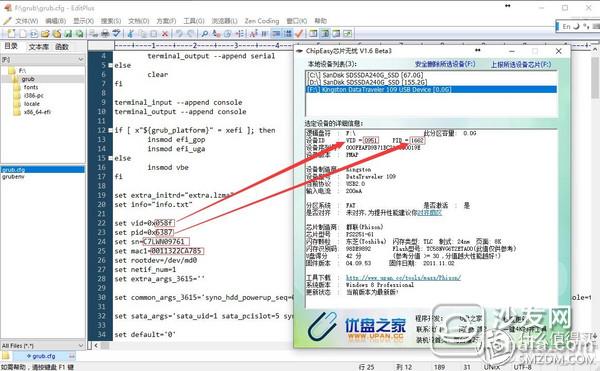
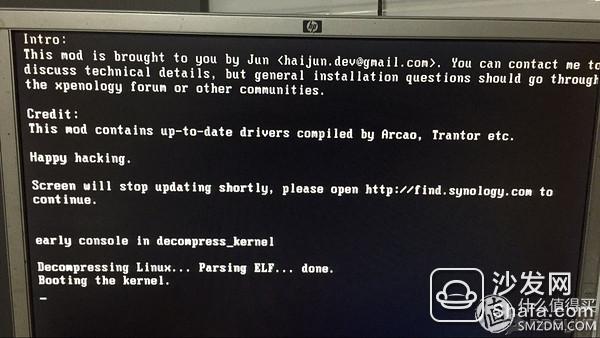
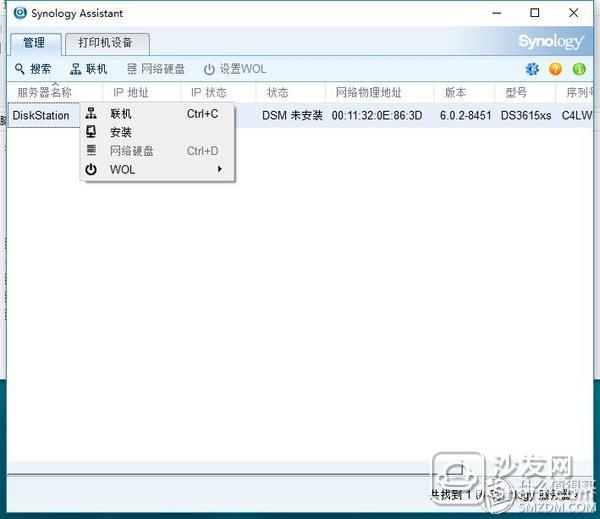
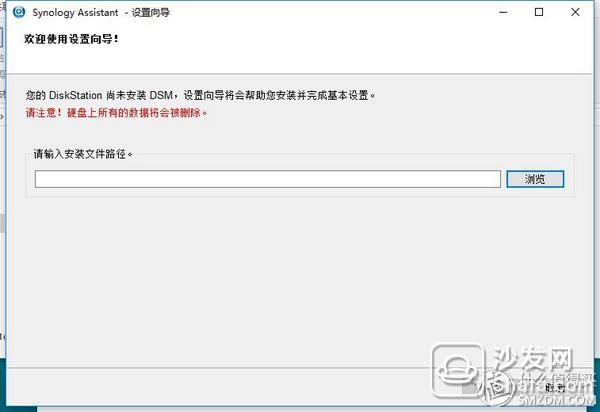
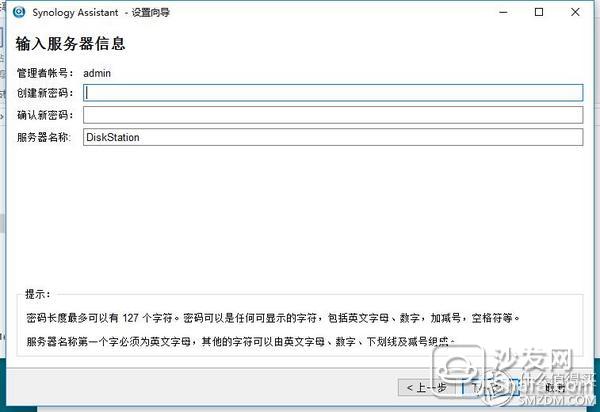
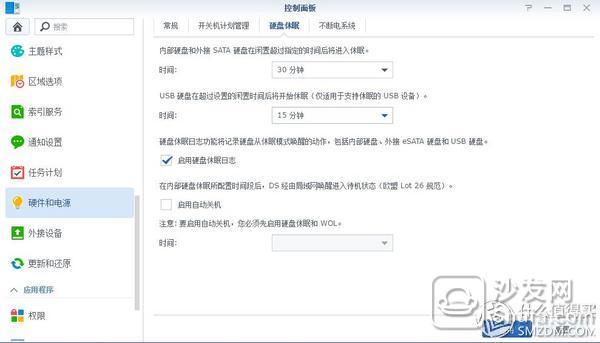
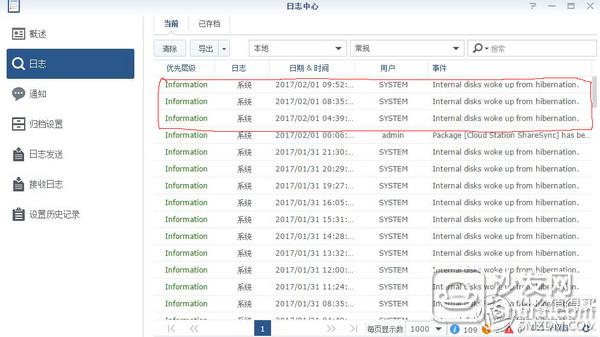
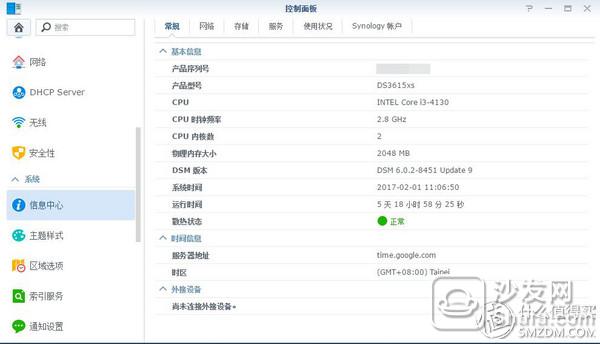
The previous article recorded my 6-disc creation record of Heiquhui, and many valued friends indicated that there was no dry goods. . . The group's installation process and related accessories were not shared. . In fact, I originally wanted to write two articles, one hardware article and one software article. I was afraid that one article would be too long to avoid reading fatigue (in fact, it was to mix more gold coins). Then, the first is the original original portal. . Then work. . In two parts. . The first is the 6.0.2 installation, followed by the use of some of the kits. . My machine is G1840+B85+2G. The hardware environment is different. The problems may not be the same. The following operations are for reference only. Let's briefly explain the overall idea (the following part is from nasyun forum): First talk about Bai Qunhui. Bai Qunhui has a memory in the machine, similar to the computer's BIOS, but it has written some special information. Then add the hard disk, the hard disk opens up two hidden spaces to install the DSM system partition and swap area. One thing to note here is that DSM will be installed on each hard disk. What do you mean? You put an HD, DSM is installed on this one HD; you put 2 HD, DSM is loaded on the first HD, once again in the second block; if you put 3 HD, 3 There is a complete DSM system on the block hard disk, so the more you put the hard disk, the slower the installation process will be. . . I am obviously not the same as the installation time for the single disk and the three disks. . 2, black group Hui. The 6.0.2 boot file produced by jun Da Shen was written to the U disk, which is the memory in the genuine Qunhui machine. DSM is the official image downloaded directly from Qunhui.com. So the DSM loaded with jun's loader is no different from genuine ones. Bahrain can directly log in to the DSM group syndicate account, with Qunhui's QucikConnectTo service, I have tried, completely no problem, in addition to the network card MAC is not Qum Fai company, the other is no different from the white group, of course, if You are willing to modify the network card address, and then with this installation, it is equal to a genuine group of Hui. Of course, if Synology has other technical means to distinguish between black and white, only Synology knows it. Perhaps Synology is more merciful, just like Microsoft promoted Windows. At this stage, everyone thanks for thanking the company. One need to use the software, boot files, U disk 1, Win32DiskImager write image file to USB 2, ChipEasy chip worry V1.6 Beta3 View USB disk vid, pid 3, text editor (I am win10, can use WordPad, or Editplus and so on) Modify the grub.cfg file 4, DSM system image and group Hui assistant, please go directly to Qun Hui official website, download DS3615xs! DS3615xs! The latest image DS3615xs of 6.0.2Updata9, and Synology Assistant (written himself looked at, you may need to download firmware is 6.0.2.8451, if the latest Updata9 can not be installed properly, and your own search download firmware 6.0.2.8451, a lot of There are almost all forums for NAS! ) 5, boot file synoboot.img write U disk through the first tool writing tool 6. Synology-mod-new.rar Synology-mod-new.rar 6, U disk one, no requirements, I tried the smallest 512M can be, and then I do not have a small, did not try. . It is recommended to use the Flash Dikudou beans, because this is the smallest U disk that can be found at the moment, and forget to plug it in. . Choose the smallest and cheapest capacity. . (In addition to the text editor and the image file, all have been packaged and uploaded. Please download it yourself. Links: Password: 5avc ) Second guide plate production 1, ready tool software, and boot files, 2. Write the boot image file to the USB flash drive. Image File selects synoboot.img. The Device selects the USB drive letter. Do not select the wrong one and confirm Write. Write successfully. . . The process is fast, about half a minute to one minute. . . 3, with ChipEasy chip worry V1.6 Beta3, view the USB disk pid / vid, run the software directly, will automatically read out all the hard disk information, select the U disk to see the U disk information, find pid and vid, record Down. . 4, using the counter to generate SN and MAC1; Unzip the Synology-mod-new.rar file and open Synology-mod-new.xlsm with EXCLE. Note that macros need to be enabled when opening. Select the model number of the Synology System in the "SynologySerial" worksheet ( DS3615xs, DS3615xs, DS3615xs , please select this!! Three times for important things! Corresponding to the boot image file you downloaded). An SN will appear. (C4LWN02052). Double-click anywhere in the table and then click somewhere on the table. A new SN will be randomly generated. In the second MAC sheel, it is the corresponding MAC address. 5, using a text editor, open the flash disk below grubgrub.cfg, modify pid, vid, sn, mac1; Which pid, vid is just detected, sn and mac1, it is just out of that. . Change it and save the changes. At this point, the most important guide plate preparation has been completed. Three groups of Hui installation 1, the U disk into the black group Hui host, connect the monitor, keyboard, network cable, home router remember to open the DHCP function; 2, boot, modify bios, to start from the U disk, save and exit, the system starts. . The following screen may appear at this time, select the third option. . It is also possible with me. . This screen does not appear. . Go straight to the next one. . It may also be directly this picture. . . Congratulations, like me. . Monitors, keyboards are no longer needed. . We don’t have any control over this machine, 3, with a group and Hui in the same LAN computer, open group Hui assistant, use the search function to find the group within the network Hui. . . It will usually be found later. . . Right-click and select Install. In the dialog box that pops up, select the image downloaded from the official website. . . Then you don't need to control it. . . . Waiting on the line. . . . Then set the admin password. . . Then continue to wait. . . The length of this process depends on how many hard disks you have hung. . This version of Synology can sleep normally and normally start the sleep function. This is the log content. . But do not know why, inexplicable will be awakened intermittently, and there is no regular awakening. . Looks like Bai Qunhui is also the same. . I am considering whether to enable the WOL function. Set automatic shutdown and wake up if needed. . It seems that Synology does not recognize the CPU of the X86. . My G1840 was identified as I3. . . This is the main interface of Synology, which is accessed by the browser via an IP address, or a shortcut generated on the desktop during installation. . The storage space administrator is set up, you can look at the profile, and set raid and so on. . This mirror supports up to 12 hard disks This is when I linked 3 hard disks. . . First, the establishment of storage space, the general steps are, in the storage space administrator tool, first create raid, divide the storage space, conditional recommendation or do raid5 it, that can enhance the hard disk performance, while there is a certain degree of data protection capabilities, Start requires 3 disks, and the final space is 3-1 disks. The new step is simple. . Drag from the left to the right. . . Then add new space in the storage space. . In raid settings, point management, related functions, such as expansion and repair. . I expanded 3 to 5 and spent more than 50 hours. . It's almost like to restore data. . However, fortunately, this process does not affect the use. . Nor does it require human intervention. . . In the upper right corner, click on the head, you can have basic options, where personal settings can modify the admin password. Change the admin password, as well as the basic settings. . The right hand side can choose what to display. . . Similar to win gadgets. . It is also called a gadget. . . This is a screenshot taken from the previous 3 games. . Synology's own download and build, there is nothing to say. The first + button is to upload the seed for download, and the second button is to paste the download link to create a new download task. . I hung up a batch of movie downloads. . . There is also a fun and useful feature, remote loading. . . You can map other NASs. . . Managed in Synology. . My data switching is to use this function, first map the previous Buffalo, and then move the contents of the Buffalo to the documents of the group. . The advantage of this operation is that the computer can be turned off after the operation is completed. . . Synology will get it in the background. This data will not be copied from the computer as if it were copied on a computer. . It's super easy to use when you move a large number of files. . . Synology has a very flexible and comprehensive rights management, you can set permissions on each folder! ! ! And can hide the entire folder for users without permission. . . What do you want to hide, such as the big sister's room. . . Set up permissions. . . Hook to hide the folder for users who do not have permission. This root directory cannot be hidden. . No permission users will still see. . But can't get in. . However, the secondary directories in the root directory are invisible to users without permissions. . and so. . . There are many tools in the kit center. . Basically, it is recommended that these be ended with stations. . It's easy to use. . . Especially photo station, cloud station server. One will mainly say these two. . . This is the kit I installed. . Among them, this suite is for HA clusters. . But open it, you can see the core temperature of the group of Hui. . . And in the control panel information center, the storage tab, you can see the stability of each hard disk. . Just discovered that the system temperature is slightly higher. . Finish this post to check and check. . . Cloud station server Focus on the cloud station server this suite. . . This kit works with the cloud terminal driver or cloud station backup on the PC to enable automatic synchronization. After the suite is installed, it opens, showing that the service has started, followed by download addresses for 3 clients. . Cloud station driver is a two-way synchronization function, cloud station backup is a one-way upload backup Before using the software, you need to set whether to enable it. . I have enabled this feature for the photo directory in order to synchronize photos. At the same time, remember that the permissions of the directory must match the account. . . This side is enabled, it will go to the PC side settings. . This is the startup interface on the PC. . There will be a simple guide. . The first time open, directly into the configuration interface. . In the local area network, fill in the group's address and username and password. . My screenshots aren't really the first configuration, so it's not the same. . Then go to this interface. . . The pen behind the point group is used to set the directory you are going to synchronize on Synology. . . Pointing to the pen behind the computer is to select the directory you are going to synchronize on your computer. . . In the future, these two directories will be automatically synchronized. . . I have established two synchronization rules. . One is a photo. . All photos on the computer are synchronized to the group's photo folder. . You can set up two-way synchronization, or just download it. . . I chose two-way synchronization because I would process the camera shots on my desktop computer, save them directly on my desktop computer, and then automatically synchronize them to Synology, so that there are always two complete backups. . At the same time, photo station has the function of automatically backing up mobile phone photos. Through the corresponding APP, mobile phone photos can be automatically imported into the group, and then through this automatic backup, mobile phone photos can be automatically backed up to the desktop from Synology. . Always ensure that the photo file is two full backups. . . This is a backup within the LAN. . If Huihui can only do this. . That's too low. . . This software supports remote backup. . The same software is installed on the notebook. . . The same interface. . . Only the quickconnect ID and username password are filled in at this time. . Then select the directory on the group and the local directory in the same way. then. . Pleasant synchronization. . What is written in the company's file? . Throw directly into this folder. . . Go home and open directly. . . Finished home and saved directly. . The next day to the company, after the boot automatically synchronized over. . . of course. The file is too big. . . This speed will be more moving. . Mainly limited by the home broadband upload rate is too slow, and the forwarding of the group Hui server, do not know whether to improve after setting port forwarding. . . You can also see the synchronization log. . This upload is the image I just cut, saved in the album directory, it will automatically upload, and the downloaded photos, the phone is automatically synchronized to the group of Hui. It will also automatically sync to the local. . This always keeps two complete backups of Synology and the desktop. . My desktop currently has a 2T disk dedicated to photos. . . At present, space is about 600G. . . and so. . Although there are many photos. . In fact, space is enough. . Or the movie takes up space. . . Photo station kit Then is the photo station's automatic photo backup feature. . I think it's a good feature. . It can be backed up to a specific location by different users. . Do not interfere with each other. . As an administrator, you can see all photos. . Haha. . After watching my wife's cell phone photos, I wouldn’t have to grab her cell phone. . Look straight from my mobile phone. . Haha. . . First, set up an account. . . You can use the system account number, you can also create a separate Photo station account, I chose a separate Photo station account, because the family to me tossing group Fai Hui, the account to his wife he did not use. . So the photo station's account is enabled. . Set the user name password, and select the prohibition of change information to limit the permissions. . You can only have read and write access to the backup directory of the phone album. To specify permissions, click on each directory setting. . Some photographs that are not related to his wife are not shown to her. . . A backup folder created specifically for your wife. . It is natural to open all permissions. . Then it is the mobile terminal settings, install the DS Photo this app. . . Use quickconnect's ID, and the account password you just set for your wife. . Don't worry about filling out quickconnect ID directly. . It will automatically determine whether it is in the LAN, when the LAN will automatically use the intranet IP login, will not go out in a circle. . . After entering, click on the button in the upper left corner, select backup photos option, see the following interface. . Then fill in the relevant information and select the directory for photo backup. . Remember to select the album you just created. . Save it. . At the same time, the software has GPS positioning and can set the trigger position. . I set up to go home, and connect to WiFi automatically backs up. . . Personally feel that this feature is still very easy to use. . . As for the basic functions of Photo station, you only need to install this kit. The system will automatically generate three folders: music, video, and photo. Just put the photos in the photo folder and Synology will automatically convert them. . Mainly generate thumbnails, this process will be slower. . Of course, Bai Qunhui will be slower because the CPU is worse. . . So Synology recommends that you use the photo upload tool to upload. . I am lazy, set the synchronization directly, let the group Hui own conversion. And I'm Black Group. . . Performance is OK. . Haha. . . Basically what I am currently using, I think it's fun, or it's easy to use, and I share it. . . At last. . Everyone has a good Lantern Festival. . Find gold coins! ! !
Dual Fuel generator assembly by dual fuel engine, alternator, radiator, controller, base frame;
. Dual Fuel engine brand: CRRC, CSSC, CSI, SWT
. World famous AC alternator brand: Stamford, Leroy Somer, Mecc Alte, Marathon, Faraday, SWT
. World famous genset controller brand: Deepsea, ComAp, Deif, Heinzmann, Woodward
. Gas Control System: Ignition system, Gas Throttle System, Ga Mixer System, Gas Train Valve System
. Start Battery system
. Optional for Remote Cooling system with CHP & CCHP Control
. CHP- Combine with Heat and Power Electrical system
. Maximum 80% Natural gas, 20% Diesel fuel
.CCHP- Combine with Cold, Heat and Power electrical system
Dual Fuel Genset,Dual Fuel Generator,Dual Fuel Power Plant,Diesel & Gas Generator Guangdong Superwatt Power Equipment Co., Ltd , https://www.swtgenset.com
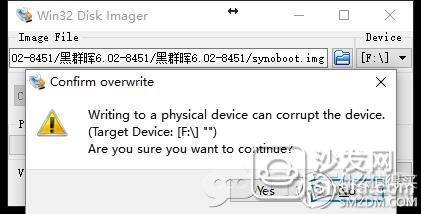


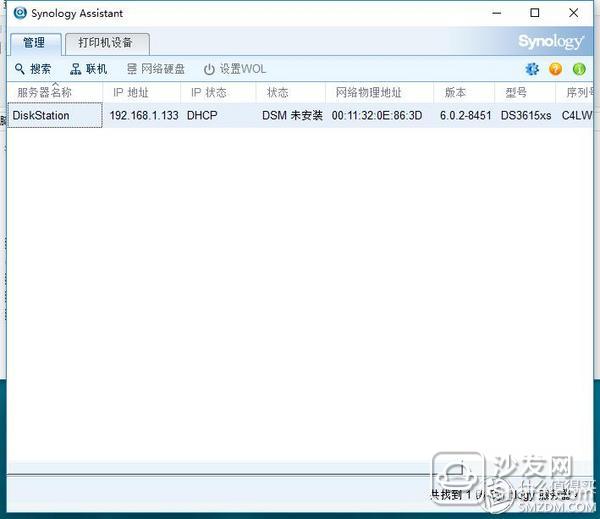

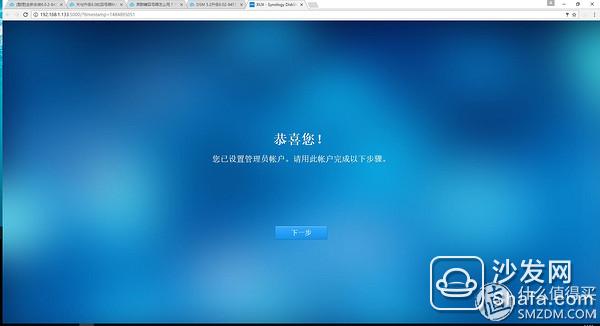
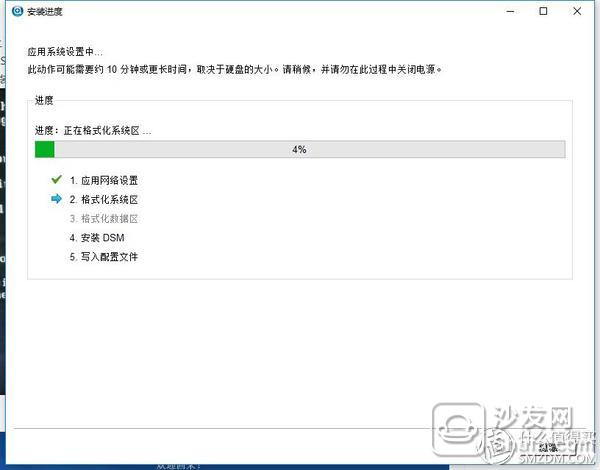 Then the installation is complete. . . Because it is using the latest official image, even the upgrade is saved. . .
 The quickconnect function can also be used normally. . Register your account normally. . .